Floating shelves look really cool and make your home look really clean. This new minimalistic design is popping up in everyone’s house. But how to remove floating shelves? Well, we have a full guide about this starting right below. So why don’t you jump into it?
Things You Need to Remove the Shelves
Firstly, there are some tools you would need if you want to get this job done. You should be able to find these simple tools anywhere in your house. The list of tools is given below.

Other than these, you should not need anything to remove the shelves. Now let’s dig into how to uninstall floating shelves.
Steps to How to Remove Floating Shelves
Here are the steps to remove floating shelves –
Step 1: Check How the Shelf is Attached
Before you start removing hidden bracket shelves, the first thing to look for is how the shelve is attached. In most cases and houses, the shelves are attached with brackets and screws. This is the most common and strong option in the bunch. So the rest of the guide is curated for shelves that use brackets and screws.
Step 2: Detach External Screws
Check for any external screws before dismantling floating wall shelves. The external screws can be located at the bottom of the shelve toward the wall. Also, the screws can be located under stickers. The stickers are there to hide the screw from plain sight.
In that case, run your palm over and bottom of the shelve to check for any stickers. If you find any, remove those screws using the screwdriver. This step is important before you start disassembling floating shelves.
Step 3: Remove Paint
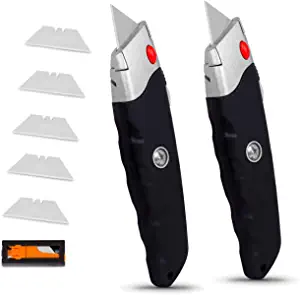
When you are done removing screws from floating shelves, you need to use the box cutter knife. Run the blade along the edge of the shelf and wall to make it loosen from the wall. You can use other knives to do this part. But make sure the blades are sharp. This is a floating shelf removal tip from the pros.
This step is also necessary if your shelf is stuck with the wall paint. Doing this step will make sure the removal process is clean. Also, it will prevent any potential wall or paint while removing floating shelves without damage.
Step 4: Pull Up or Toward You to Dismount the Shelve
This is the step where it can be different depending on the style of the shelf. If you are using a French cleat floating shelve, you have to pull it upwards to remove it. But if your shelf uses a general bracket, then you have to pull it towards you. The shelf will easily slide and come out from the brackets.
Be careful while you take down floating shelves. It can be quite heavy, depending on the length. So, make sure you are strong enough, or there’s nothing too shy to call a friend for help. This will also make sure you are not damaging the brackets or the shelve itself.
Step 5: Dislocate the Brackets
Now the board of the shelve is removed, all you need to do is remove the brackets. To remove the brackets, take the screws off using the screwdriver. There should be at least 4 screws in each bracket. Make sure to go in the cross pattern for easier removal.
Step 6: Detach the Anchors in the Drywall
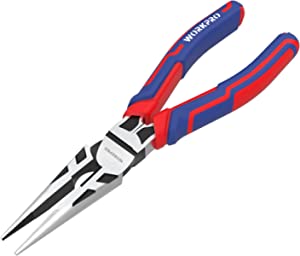
After removing the brackets, all there left in the walls are the anchors. The anchors are the part that holds the screw in the wall for the bracket. You can use the pointy pliers we suggested above to remove the anchors from the wall.
This step is up to you. Removing the anchors is not necessary. But this extra step will make the wall prepare to apply drywall patch and paint again. Other than that, this is how to remove floating shelves. Also, if you reverse the process, you can hang the floating shelf again.
Different Styles of Floating Shelves
There are different styles of floating shelves you can use. And each of them has a different process of hanging and removing. So, it’s better to be familiar with all the styles of floating shelves.
Brackets and Screws
Using brackets and screws is the most common, and we already discussed how it can be removed. If your shelf is using brackets and screws, there will be 4 parts of the shelf. The board, brackets, screws, and wall anchors. When removing, you need to slide the board toward you from the brackets.
French Cleat
The French cleat is technic that uses a wooden bracket where the shelf hangs. The wooden part which screws on the wall has a slanted part on the top, where the shelf attaches with a similar slanted part which is at the exact opposite angle of the wooden part in the wall.
So how to detach floating shelves which has French cleat? You need to push the shelf upwards to remove it. The French cleat floating shelf has 4 parts. The part which attaches to the wall, the shelf, screws, and wall anchors.
In comparison to the French cleat style and bracket-style, the bracket-style is a bit stronger and can hold more weight. But the French cleat style is more simple and easy to attach.
Glue
If you don’t want any trouble with screws or drilling, using glue to attach the shelf would be the best option. But there are drawbacks to it. First of all, the shelves will have a weaker weight capability. Secondly, removing adhesive floating shelves will definitely leave a mark on the wall and will need a repaint in the area.
So make sure you are up for it. Also, it’s really important to use some strong glue for this type of application.
How to Fix Paint From an Area Where the Shelve Was Attached?
Now, let’s make the place like nothing was attached here. You would be needing a few things to make the place look like new. Check the list of things you would be needing below to do this job.
- Sandpaper
- Paint
- Drywall patch
These are the few things you would be needing. Now let’s get down to the process.
- Sand the area using sandpaper, making sure it’s a smooth, even surface.
- Fill the hole in the wall using a drywall patch and let it dry. Use the sandpaper again after drying, making the area smooth for painting.
- Before painting, make sure there is no dust on the surface. Use a higher grit sandpaper for the paint to stick on the wall.
- Apply the paint using a paintbrush. To ensure an even coat on the wall, you can apply the paint again after the first coat dries.
And there you go, the wall is brand new again!
FAQs on How to Remove Floating Shelves
How do you get Ikea floating shelves off the wall?
First of all, locate the screws under the shelving board. The screws are along with the brackets of the shelve. After you take the screws off, the shelf will slide right off the brackets. Then all you have to do is remove the brackets by detaching the screws on the bracket.
Are floating shelves safe?
Floating shelves are absolutely safe, but you have to make sure it’s not overloaded and attached to the wall properly. To make it safer, make sure the shelves are not easily accessible by children and not above your bed.
Are floating shelves easy to remove?
Floating shelves are really easy to remove. But you do need to know the process of removing it. Floating shelves hide the attachments so that it looks more pleasing. So make sure you know how the shelve is attached.
What are pullout shelves?
A pullout shelf can come forward to you for easier access. Usually, these shelves are attached will railings so they can slide toward you for easy storing. Pullout shelves are also known as glide-out shelves, roll-out shelves, sliding shelves, or slide-out shelves.
How do you remove built-in shelves from a closet?
Remove anything on the shelves before you start working. If your shelf has a poll bar in front, remove the poll. Take a box cutter knife and run it along the hanger and the board to detach it from the paint. If the board is attached to screws, take the screws off. Also, take the brackets off by loosening the screws. Now remove the board where the hangers are attached using a pry bar. The last step can be a bit messy, so be careful.
How do you remove roller shelves?
Pull the shelf all the way out. On the side of the shelf guide, you can find a little lever. It can be blue, red or black. On one side, it’s gonna lift up, and on the other side, it’s gonna be the opposite, so push down. Now you can pull the shelf out.
Verdict
So, that is everything you need to know about how to remove floating shelves.
Floating shelves are really cool and make your place more aesthetic. But be sure not to hurt yourself while hanging or removing the shelf. Good luck removing your floating shelves! Also you may want to know How Deep Should Floating Shelves Be? Read our article on this
Share the joy
Fatal error: DISEVAL - Use of eval is forbidden in /home/t1nyus/rigmyhome.com/wp-content/plugins/gp-premium/elements/class-hooks.php(215) : eval()'d code on line 1