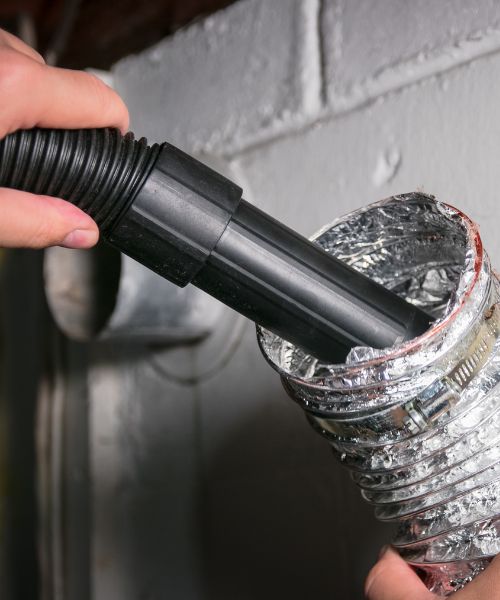
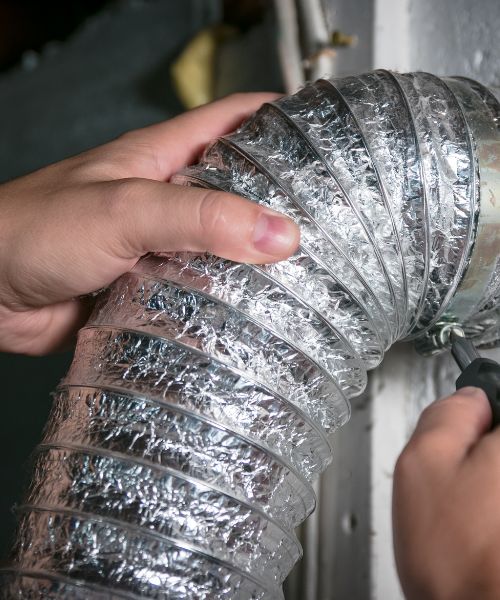
Cleaning a dryer vent without the need to climb onto the roof has always seemed challenging to me. However, I’ve discovered that the process can be straightforward with the right approach. By understanding the roles of roofing nails, vent pipes, and vent tubes, I found ways to effectively clean the dryer vent. I made sure to disconnect the power source and pull the dryer away from the wall to access the vent and clean it thoroughly. Using a brush to clean inside and wrapping a towel around the opening prevented lint from coming back into the room. This approach has made maintaining my dryer vent simpler and safer, eliminating the risks associated with climbing on the roof.
Initiating the Cleaning Process
How to Clean Dryer Vent Without Going on Roof
I understand the importance of starting the cleaning process with a clear plan. After gathering all the necessary tools and ensuring that I have enough time to complete the task, I am ready to tackle the job. The process involves several steps, but by breaking it down and taking it step by step, I ensure that the vent gets thoroughly cleaned, enhancing my dryer’s efficiency and safety.
Identifying the Need for Dryer Vent Cleaning

Initially, I wasn’t sure how often I needed to clean my dryer vent. But then, I learned that the standard advice is to use a vent brush at least once every 12 months. This helps to keep the dryer vent duct free of lint and other debris. However, with my pets and the high volume of laundry my family generates, I found that more frequent cleaning is necessary to prevent clogs and maintain efficiency.
Signs That Maintenance is Needed
I’ve learned to watch for signs indicating that my dryer vent needs cleaning. One clear signal is an increase in the drying cycle time. If clothes are taking longer to dry or if the dryer feels unusually hot during operation, it’s likely time to check and clean the vent. These signs help me address issues promptly, avoiding more significant problems down the line.
How Often Do You Need to Clean Your Dryer Vent?
After recognizing the importance of regular maintenance, I’ve established a routine for using my vent brush and dryer vent cleaning kit. At minimum, cleaning the dryer vent duct annually is a must, but I adjust this schedule based on usage, the presence of lint and other debris, and whether my household activities increase the likelihood of vent clogs. This proactive approach keeps my dryer running efficiently and safely.
Understanding Dryer Vent Types and Their Significance
Rigid Metal Vents
Through my research, I discovered that rigid metal vents are considered the safest and most efficient type for dryer venting. These vents are durable and less susceptible to crushing, which means they maintain good airflow and are less likely to accumulate lint. Knowing this, I checked my system and was relieved to find that my home was equipped with rigid metal vents.
Semi-rigid Metal Vents
While semi-rigid metal vents are not as robust as their fully rigid counterparts, they still offer a good level of durability and safety. They’re a bit more flexible, which can be helpful in tight spaces, but they also have a smooth interior surface to minimize lint buildup. I considered this option for areas where a straight path for the vent isn’t possible.
Foil Ducts and Thin Foil Transition Ducts
In my quest to understand all the options, I learned about foil ducts and thin foil transition ducts. These are more flexible than metal vents but are also more susceptible to kinks and crushing, which can restrict airflow and increase the risk of lint buildup. I decided these were not the best choice for my home, given the potential safety risks.
Importance of Knowing Your Dryer Vent Type
Understanding the type of venting system my dryer uses has been crucial in determining the best cleaning process. Each type of vent requires a slightly different approach to cleaning to ensure efficiency and safety. This knowledge has helped me tailor my cleaning process to suit my specific needs and ensure that my dryer operates safely and efficiently.
Effective Strategies for Dryer Vent Cleaning
Cleaning your dryer vent can initially seem daunting, but I’ve learned that with the right tips and tools, the process becomes more efficient and safe. I’ve found success in developing a clear plan and using specific strategies that make cleaning dryer vents less of a hassle and more of a straightforward task.
Preparing for a Hassle-Free Cleaning
For me, preparing for vent cleaning involves more than just gathering tools; it’s about ensuring I approach the task with safety and efficiency in mind. I start by cleaning the vent from the indoor duct connection, which allows me to work from inside my home without the need to climb onto the roof. This method has proven to be both safer and just as effective.
Unplugging the Dryer and Locating the Vent
Before I begin, I always make sure to unplug the dryer and locate the vent. In my laundry room, the vent cover is easily accessible, and I don’t have to worry about climbing on the roof. This step is essential home maintenance that ensures I can clean out my dryer safely and effectively, preventing potential fire hazards and improving the efficiency of my dryer.
Choosing the Right Cleaning Tools
Equipping myself with the right dryer vent cleaning kit and extension rods has been a game-changer. These tools allow me to reach deep into the vent duct, ensuring that I remove all the lint and debris that could block airflow. I’ve found that investing in quality cleaning tools not only makes the job easier but also more thorough.
The Interior Approach: Cleaning from Inside
I’ve found that cleaning the vent from the indoor duct connection is the most practical approach for me. This method lets me avoid the risks associated with climbing on the roof. By disconnecting the dryer and using a specialized lint brush kit, I can thoroughly clean the vent and vacuum up all the lint, ensuring my dryer operates safely and efficiently.
Vacuuming the Inside of the Dryer and Vent Tube
First, I make sure to unplug my dryer for safety. Then, I pull it away from the wall to easily access the vent hose. I use a long hose attachment on my vacuum to reach inside the vent tube. This helps me remove all the air and lint that might be stuck inside. It’s an effective way to decrease the risk of fire in my home.
Dryer Lint Filter Cleaning
After every load of laundry, I clean the lint filter. But, for a deep clean, I wash it with warm, soapy water. This removes any residue that might block air flow. Once it’s dry, I put it back. This simple step plays a big role in preventing clogs and maintaining a safe dryer.
Vent Hose Inspection
Next, I inspect the vent hose. I look for any signs of wear or damage. If I find holes or tears, I replace the hose to ensure it’s working properly. A damaged vent hose can be a major fire hazard, so this inspection is crucial for safety.
The Exterior Method: Cleaning from the Ground
This method allows me to clean the vent without climbing onto the roof. I disconnect the dryer and use a lint brush kit to clean the vent from the inside. I make sure to vacuum up all the lint to prevent any fire risks.
Using a Leaf Blower to Clean Your Dryer Vent Efficiently
I find that using a leaf blower is a quick way to clear lint buildup. After ensuring the vent and seal are secure, I turn the leaf blower on for about 40 seconds. This powerful blast removes any trapped lint from the vent tube, making it a fast solution.
Wear Protective Gear for Safety
Before I start cleaning, I always put on protective gear. This includes gloves and a mask to avoid inhaling lint dust. Safety glasses protect my eyes from any debris that might be blown out. This gear keeps me safe while I’m ensuring my home is too.
Advanced Tips for Maintaining a Clean Dryer Vent
For more efficient cleaning, I use flexible rods and a hose attachment designed for my vacuum cleaner. These tools help me reach further into the metal duct. If I have a gas dryer, I’m extra cautious to unplug it and clean around the exterior gently.
Scheduling Regular Cleanings
I’ve found that consistency is key. I set a regular schedule to clean my dryer vent and mark it on my calendar. This helps me remember to perform this important maintenance task, ensuring my dryer operates efficiently.
Signs That Your Dryer Vent Might Be Clogged
One major sign of a clogged dryer vent is a burning smell when the dryer is running. This indicates that lint is getting too hot, which is a serious fire hazard. If I notice this smell, I know it’s time to clean the vent immediately.
Regular Schedule for Cleaning
I aim to clean my dryer vent at least once a year. However, if I notice my clothes taking longer to dry or the outside of the dryer feels hotter than usual, I clean it sooner. Staying on top of this schedule helps prevent clogs and keeps my dryer running smoothly.
Post-Cleaning Measures for Long-Term Efficiency

After cleaning, I reconnect my dryer duct and move the dryer back to its original position. A test run helps me ensure that air flow has improved and the dryer is operating as expected. This confirms that my cleaning was successful.
Reconnecting the Dryer and Performing a Test Run
Once everything is reconnected, I do a test run with a few towels. This helps me check the air flow and make sure everything is working correctly. If the towels dry properly and the dryer is running smoothly, I know I’ve done a good job.
Vent Maintenance Tips to Prevent Future Clogs
To prevent future clogs, I regularly clean the lint filter and inspect the vent hose for damage. I also make sure the outdoor vent flap opens freely. These simple steps help maintain a safe and efficient dryer vent system.
To DIY or Not to DIY: Evaluating Your Options
While I enjoy saving money by cleaning the vent myself, I know that professional cleaners have the tools and expertise to do a thorough job. They can spot issues I might miss, which is why sometimes calling in a professional is the best choice.
When You Should Consider Professional Dryer Vent Cleaning
If I ever find it too challenging to clean the vent, especially when dealing with clogged dryer vents and potential fire hazards, I consider hiring professional dryer vent cleaners. Their training and experience equip them to handle the job safely and efficiently.
Difficulty With a Dryer Vent That Doesn’t Go to the Roof
Cleaning a dryer vent that doesn’t go to the roof presents unique challenges. Unlike roof vents, these dryer vents often exit through the side of a home, making them more susceptible to blockages as lint gets stuck more easily in bends or longer vent paths. This situation requires careful attention and perhaps different tools to ensure the vent is thoroughly cleaned, avoiding potential fire hazards associated with clogged dryer vents.
What to Expect from a Professional Cleaning Service
When hiring professional dryer vent cleaners, expect a thorough service that goes beyond what I might achieve on my own. These experts use specialized tools like high-powered vacuum systems and flexible brushes to effectively clean the entire length of the dryer vent. They know how to navigate the exterior vent safely and ensure that no lint or debris is left behind, reducing the risk of fire hazards. Plus, they can spot any potential issues with my vent that I might miss.
Comparing DIY and Professional Dryer Vent Cleaning
DIY dryer vent cleaning can be appealing because it seems less expensive and immediate. However, comparing DIY to professional dryer vent cleaning reveals significant differences. Professionals bring expertise, advanced tools like drill brushes, and knowledge of how to clean thoroughly and safely. In contrast, DIY efforts might miss hidden lint or fail to clean the entire vent length, potentially leading to clogged dryer vents and associated risks.
Pros
Professional dryer vent cleaning offers unmatched thoroughness, thanks to the use of specialized tools and techniques. These experts can effectively clean areas I can’t easily reach, ensuring a comprehensive clean that significantly reduces fire hazards. Additionally, their expertise allows them to identify and address potential issues before they become serious problems, offering peace of mind and long-term savings.
Cons
The main drawback of professional dryer vent cleaning is the cost. While DIY methods only require my time and perhaps the purchase of a few tools, hiring professionals involves a higher upfront expense. Additionally, scheduling the service and ensuring availability may not always align with my immediate needs, potentially leading to delays in getting the vent cleaned.
Costs of Professional Cleaning
The costs of professional dryer vent cleaning can vary widely depending on the length of the dryer vent, the level of buildup, and the ease of access to the vent. Typically, I might expect to pay anywhere from $100 to $200 for a service. While this is more expensive than a DIY approach, the investment is worthwhile for the safety benefits and efficiency improvements it brings to my home.
Concluding Thoughts: Embracing a Cleaner, Safer Home
Maintaining a clean clothes dryer vent is essential for both the efficiency of drying clothes and the safety of our homes. Regularly removing lint from the lint screen after every load of laundry is a simple yet effective way to prevent dryer fires. This routine, along with occasionally letting clothes air dry, can significantly improve the performance of the dryer and reduce the risk of fire hazards. It’s also wise to never leave a dryer running unattended, as a dryer fire can quickly escalate if not immediately addressed. By adopting these practices, we can ensure our dryer runs smoothly, our clothes dry properly, and our homes remain safe.
Share the joy

Fatal error: DISEVAL - Use of eval is forbidden in /home/t1nyus/rigmyhome.com/wp-content/plugins/gp-premium/elements/class-hooks.php(215) : eval()'d code on line 1